I like the smudge tool because, like the brush, it has a real world analog, which means it’s a bit easier for new users to figure out how it works. Just about everyone has played with finger paints before, and knows what happens when you drag your finger through paint.
I originally thought the smudge tool would be rather complex. I was pleasantly surprised that it was quite simple to implement. So, as a bonus, I went ahead and threw in a stamp tool implementation too.
Overview
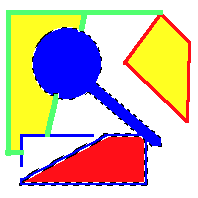
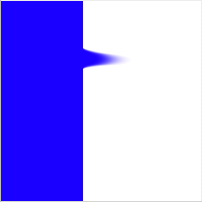
Your basic smudge tools smears the paint as if you dragged a clean brush across it. For example if you start with simple image below:

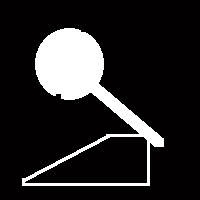
then drag the smudge tool from the left to the right (i.e. from the blue to the white), your get:
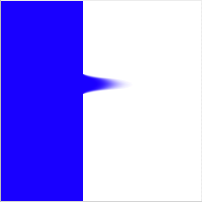
How much of a smudge you get is determined by how much pressure is applied.
The idea behind a smudge tool is that as you drag a brush through paint, both the canvas and brush swap paint. The brush picks up paint from the canvas then deposits it elsewhere on the canvas. If you’re familiar with bitmap editors, that almost sounds like the stamp brush tool, which it is, so as a bonus we’ll cover how to implement a stamp brush tool.
Algorithm
When researching how to implement a smudge tool, I found that just about everyone has a different implementation. They range from the very simple, to the very complex which are trying to accurately simulate the physical characteristics of a brush dragged across paint. The algorithm that I’ll present here definitely falls on the simple side, but it is reasonably close to what popular graphics editors implement.
The first thing to remember is that the smudge tool is just a special kind of brush. As a result, it is implemented in a very similar fashion to bitmap brush. In fact, if you haven’t yet already read the article “How to implement a basic bitmap brush”, you should do that now. The main difference between the simple bitmap brush and the smudge tool is how it renders a single stamp.
Instead of using a single color in the shape of the brush tip, the smudge tool will use a piece of the canvas, in the shape of the brush tip, as the stamp image. It locates the piece of canvas to be used as a brush image by looking at the last location it rendered a stamp. It grabs the canvas at that point and uses it as the brush tip.
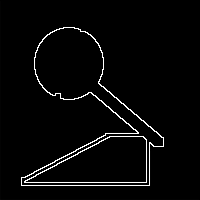
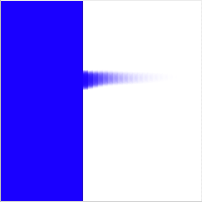
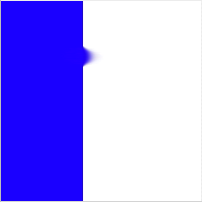
The only other deviation from the usual stamping algorithm is the stamp spacing. For most brushes, the stamps are spaced 1/4 of brush tip wide. However, since the smudge tool takes its brush tip from the previous render location, it requires a spacing of one pixel. If we were to use the standard spacing, we’d end up with a choppy smudge, like so:
That’s it for our simple smudge algorithm. If we wanted something more complex, we could create a separate drawing context for the brush tip image, and have it actually accumulate paint from the canvas. We could also have the brush tip textured, so it picked up paint more in the raised areas of the brush.
Code architecture
As always, I have provided sample code to demonstrate the smudge tool. It is heavily based on the sample code from the brushes article, so we will only cover the differences between the smudge tool and a normal brush. There are four classes in the sample code: MyDocument, CanvasView, Canvas, and Smudge.
MyDocument is derived from NSDocument, and exists only to load up a user selected NSImage and hand it off to CanvasView. It is almost identical to the MyDocument used in the magic wand article, plus it doesn’t do anything terribly exciting, so we’ll ignore it from here on out.
CanvasView is a NSView derived class that renders the canvas to the screen, and catches mouse events to pass off to the Smudge class to handle. It also acts like a moderator between the Smudge and Canvas classes. It is nearly identical to the CanvasView class used in the brushes article, so we’ll ignore it the rest of the article.
The Canvas class represents the canvas the user draws onto. It can render itself into a NSGraphicsContext, and provides drawing primitives to render a simple brush stamp and a line of stamps. Although the stamping algorithm hasn’t changed from the brushes article, the Canvas class does use a different backing implementation and parameters, which warrants a quick revisit in this article.
The Smudge class represents a brush that can be used to smear paint across the canvas. Since it is a type of brush, it is heavily based on the Brush class used in the brushes article. In this article, we will only cover what the differences are. In this code, the smudge tool not only processes the user’s mouse events, it is also responsible from rendering a single stamp onto the canvas.
We’ll tackle the changes in the Canvas class first, then dig into the Smudge class.
Canvas
Unlike its previous incarnation, the Canvas class here is backed by a CGLayerRef, instead of a CGBitmapContext. This allows both greater ease of use when stamping from the canvas onto itself, and better performance. There is no init method on this class because it requires an NSImage, which will be specified later. There is a dealloc method, which simply releases the CGLayerRef.
Initialization
The initialization happens when the setImage method is called by the CanvasView class. It is responsible for creating a CGLayerRef of the proper size and rendering the NSImage parameter into the layer:
- (void) setImage:(NSImage *)image view:(NSView *)view
{
	// First free up the previous layer, in case the new one is a new size
	CGLayerRelease(mLayer);
	mLayer = nil;

	// Next, create a new layer the size of the image. For performance reasons,
	//	we want to base our layer off of the window context.
	NSGraphicsContext* windowContext = [NSGraphicsContext graphicsContextWithWindow:[view window]];
	CGContextRef context = [windowContext graphicsPort];

	NSSize size = [image size];
	mLayer = CGLayerCreateWithContext(context, CGSizeMake(size.width, size.height), nil);
Although in the sample code we never call setImage more than once, we cover that possibility here by freeing up any previously existing layer. Note that we pass in the NSView we’ll eventually render into as a parameter. This is for the purpose of creating the CGLayerRef. The layer needs to be based on a CGContextRef similar to the one that it will eventually be rendered into, in order to get the best performance. To that end, we create grab the NSGraphicsContext for the window the view is inside. We then create the layer based on that and the size of the image.
Next, we need to render the NSImage we got as a parameter into our layer:
	// Pull out the NSGraphicsContext from the layer and focus it so we can
	//	use Cocoa class to draw into it.
	CGContextRef cgLayerContext = CGLayerGetContext(mLayer);
	NSGraphicsContext* layerContext = [NSGraphicsContext graphicsContextWithGraphicsPort:cgLayerContext flipped:YES];

	[NSGraphicsContext saveGraphicsState];
	[NSGraphicsContext setCurrentContext:layerContext];

	// Some images might have transparency, so fill the background with an opaque
	//	white. Real apps would probably do a checkerboard pattern.
	[[NSColor whiteColor] set];
	[NSBezierPath fillRect:NSMakeRect(0, 0, size.width, size.height)];

	// Draw the image, with no scaling
	[image drawAtPoint:NSMakePoint(0, 0) fromRect:NSMakeRect(0, 0, size.width, size.height) operation:NSCompositeSourceOver fraction:1.0];

	[NSGraphicsContext restoreGraphicsState];
}
We’re going to use Cocoa drawing classes to render the image, so we need to go from our CGLayerRef to a focused NSGraphicsContext. Fortunately, CGLayerRef has a method that will return a CGContextRef, and NSGraphicsContext has a constructor that will take a CGContextRef. The first bit of drawing we do is to render a white background. This is for the case of a transparent image. Finally, we render the image into the current NSGraphicsContext, which happens to our layer. Our Canvas object is now initialized and ready to be used.
Drawing the canvas onto a view
After initialization, the first thing we’ll be asked to do in the Canvas class is to render. This is covered in drawRect:
- (void)drawRect:(NSRect)rect inContext:(NSGraphicsContext*)context
{
	if ( mLayer == nil )
		return;

	// Very straight forward: just draw our layer in the given context at 0, 0
	CGContextRef cgContext = [context graphicsPort];
	CGContextDrawLayerAtPoint(cgContext, CGPointMake(0, 0), mLayer);
}
This is almost too trivial to cover. If we have created a layer, we render it into the NSGraphicsContext passed in. The End.
Rendering a line of stamps
As we covered earlier, the stamping algorithm hasn’t changed from the brushes article, although one of the parameters has, and a constant derived from that parameter. Since the line stamping is rather long, we’ll only review the part that has changed, which, fortunately for us, is only the function signature and the first line of code:
- (float)stamp:(Smudge *)brush from:(NSPoint)startPoint to:(NSPoint)endPoint leftOverDistance:(float)leftOverDistance
{
	// Set the spacing between the stamps.
	float spacing = [brush spacing]; // Ask the brush
Instead of passing in an image to be used for stamping, we now pass in the smudge tool. This is because the Smudge class is now responsible for rendering a single stamp. Also, we want the spacing for the stamping to be configurable based on the brush. So instead of computing the stamp spacing here in the Canvas class, we ask the brush for it.
The rest of the method is the same as before.
Rendering a single stamp
The last part of the Canvas class to cover is the rendering of a single stamp, which as noted above, is no longer handled in the Canvas class:
- (void)stamp:(Smudge *)brush at:(NSPoint)point
{
	// Just pass through to the brush to ask it to render. Give it the layer
	//	that backs the canvas, and the point to render at.
	[brush render:mLayer at:point];
}
We just hand the rendering of a stamp off to our Smudge class. We provide it with the canvas layer, so that it can pull pixels from it and render into it.
As you can see, the main ideas of the Canvas class didn’t change, but a bit of the implementation did, in order to make it more flexible.
Smudge
The Smudge class contains most of the interesting code. Like its predecessor, Brush, it tells the Canvas class where to render lines and single points. However, it is also responsible for rendering a single stamp. Since Smudge and its predecessor have so much in common, we’ll only discuss where they differ.
Parameters
The smudge tool has some new parameters that weren’t in the basic brush class. They are initialized in init:
- (id) init
{
	self = [super init];

	if ( self ) {
		// Set the size of the brush. A radius of 10 means a 20 pixel wide brush
		mRadius = 10.0;

		// Create the shape of the tip of the brush. Code currently assumes the bounding
		//	box of the shape is square (height == width)
		mShape = CGPathCreateMutable();
		CGPathAddEllipseInRect(mShape, nil, CGRectMake(0, 0, 2 * mRadius, 2 * mRadius));
		//CGPathAddRect(mShape, nil, CGRectMake(0, 0, 2 * mRadius, 2 * mRadius));

		// Set the initial smudge color, that starts out on the brush. May be nil,
		//	if you don't want a smudge color.
#if 1
		mColor = nil;
#else
		CGColorSpaceRef colorspace = CGColorSpaceCreateWithName(kCGColorSpaceGenericRGB);
		float components[] = { 0.0, 0.0, 1.0, 1.0 }; // I like blue
		mColor = CGColorCreate(colorspace, components);
		CGColorSpaceRelease(colorspace);
#endif

		// The "softness" of the brush edges
		mSoftness = 0.5;

		// The pressure at which to smudge. The more pressure, the more of a smudge
		//	will result.
		mPressure = 1.0;

		// Initialize variables that will be used during tracking
		mMask = nil;
		mLastPoint = NSZeroPoint;
		mLeftOverDistance = 0.0;
		mLastRenderPoint = NSZeroPoint;
	}

	return self;
}
There are two new parameters: mPressure and mColor. Although mColor was also in the brush class, its function is different for the smudge tool.
- mPressure Pressure mimics how hard the user is pressing down on the canvas, and as a result, how much the paint is smeared. It has a range of 0.0 to 1.0, where 0.0 means the paint doesn’t smudge at all, and 1.0 means it smudges a lot.
Examples:
- mPressure = 0.1,
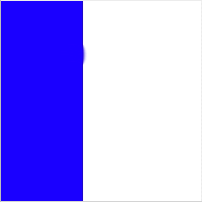
- mPressure = 0.5,
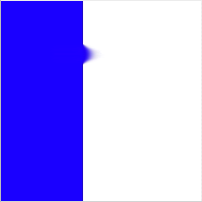
- mPressure = 1.0,
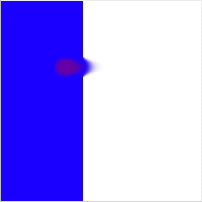
- mColor Color is used to determine if the brush used for smudging is dirty. i.e. Does the brush start out with some paint already on it? If so, it leaves an initial smudge of the specified color. If mColor is nil, then the smudge tool simulates a clean brush.
Examples:
- mColor = [1.0, 0.0, 0.0],
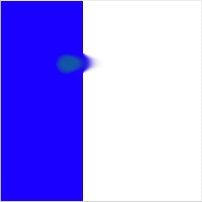
- mColor = [0.0, 1.0, 0.0],
- mColor = [0.0, 0.0, 1.0],
The rest of the parameters are identical to those in the regular brush class.
Creating the brush tip
The job of creating the brush tip is a bit different in the smudge tool than the original brush tool. In the original brush we created a full ARGB image in the brush color with the correct transparency. Since our brush image is going to be pixels from the canvas, we just want the brush tip, mMask, to reflect the shape, or transparency, of the brush. So instead of a full color image, we create a grayscale image with no alpha that will act as a mask for our actual brush image. This allows us to impose our brush shape onto any random image.
The new createBrushTip method looks like:
- (CGImageRef) createShapeImage
{
	// Create a bitmap context to hold our brush image
	CGContextRef bitmapContext = [self createBitmapContext];

	CGContextSetGrayFillColor(bitmapContext, 1.0, 1.0);

	// The way we acheive "softness" on the edges of the brush is to draw
	//	the shape full size with some transparency, then keep drawing the shape
	//	at smaller sizes with the same transparency level. Thus, the center
	//	builds up and is darker, while edges remain partially transparent.

	// First, based on the softness setting, determine the radius of the fully
	//	opaque pixels.
	int innerRadius = (int)ceil(mSoftness * (0.5 - mRadius) + mRadius);
	int outerRadius = (int)ceil(mRadius);
	int i = 0;

	// The alpha level is always proportial to the difference between the inner, opaque
	//	radius and the outer, transparent radius.
	float alphaStep = 1.0 / (outerRadius - innerRadius + 1);

	// Since we're drawing shape on top of shape, we only need to set the alpha once
	CGContextSetAlpha(bitmapContext, alphaStep);

	for (i = outerRadius; i >= innerRadius; --i) {
		CGContextSaveGState(bitmapContext);

		// First, center the shape onto the context.
		CGContextTranslateCTM(bitmapContext, outerRadius - i, outerRadius - i);

		// Second, scale the the brush shape, such that each successive iteration
		//	is two pixels smaller in width and height than the previous iteration.
		float scale = (2.0 * (float)i) / (2.0 * (float)outerRadius);
		CGContextScaleCTM(bitmapContext, scale, scale);

		// Finally, actually add the path and fill it
		CGContextAddPath(bitmapContext, mShape);
		CGContextEOFillPath(bitmapContext);

		CGContextRestoreGState(bitmapContext);
	}

	// Create the brush tip image from our bitmap context
	CGImageRef image = CGBitmapContextCreateImage(bitmapContext);

	// Free up the offscreen bitmap
	[self disposeBitmapContext:bitmapContext];

	return image;
}
Note that createBitmapContext actually creates a grayscale bitmap context with no alpha that is filled to completely black. The only real difference in createBrushTip is that we set the color to white instead of a user specified color. In an image that is used as a mask, white means that a pixel is full opaque, while black means the pixel will be fully transparent.
Rendering a single stamp
The real meat of Smudge is where we render a single stamp of the brush into the canvas’s CGLayerRef. The render function starts out like the old single stamp method on Canvas:
- (void) render:(CGLayerRef)canvas at:(NSPoint)point
{
	// Grab the context for the canvas. No matter what, we're going to determine
	//	where the current brush stamp should go, then translate the context
	//	to that position.
	CGContextRef canvasContext = CGLayerGetContext(canvas);
	CGContextSaveGState(canvasContext);

	// So we can position the image correct, compute where the bottom left
	//	of the image should go, and modify the CTM so that 0, 0 is there.
	CGPoint bottomLeft = CGPointMake( point.x - CGImageGetWidth(mMask) * 0.5,
									  point.y - CGImageGetHeight(mMask) * 0.5 );
	CGContextTranslateCTM(canvasContext, bottomLeft.x, bottomLeft.y);
We grab the context off the layer, which is really our canvas, and apply an affine transform to it such that the origin is where we want to draw the bottom left of our brush image.
Next, we want to force the shape of our brush onto our brush image:
	// Our brush has a shape and soft edges. These are replicated by using our
	//	brush tip as a mask to clip to. No matter what we render after this,
	//	it will be in the proper shape of our brush.
	CGContextClipToMask(canvasContext, CGRectMake(0, 0, CGImageGetWidth(mMask), CGImageGetHeight(mMask)), mMask);
We simply apply the image we created up in createBrushTip to the context as a clipping mask.
The last thing we need to do before actually rendering the brush image, is to deal with the mPressure parameter:
	// The pressure of the smudge is a one to one correspondance with the amount
	//	transparency of the brush stamp.
	CGContextSetAlpha(canvasContext, mPressure);
As you can see, the pressure is directly related to how transparent with render the brush image. If the user is applying a lot of pressure, then we render the brush image fully opaque. If the user applies less, then the brush image is rendered more transparent.
Now we’re ready to render the brush image:
	// If this is our first stamp, then we normally don't want to lay down any
	//	ink. That's because if we're smudging with a clean brush, we don't have
	//	any ink on the brush to lay down. Only after the initial stamp will we
	//	have the ink from the canvas to lay down.
	if ( !NSEqualPoints(mLastRenderPoint, NSZeroPoint) ) {
		// Based on the last render point that we keep track of, determine the
		//	source bounds.
		CGPoint sourceBottomLeft = CGPointMake( mLastRenderPoint.x - CGImageGetWidth(mMask) * 0.5,
												mLastRenderPoint.y - CGImageGetHeight(mMask) * 0.5 );

		// We pull straight from the canvas, and render directly onto the canvas. CGLayerRefs
		//	make this easy.
		CGContextDrawLayerAtPoint(canvasContext, CGPointMake(-sourceBottomLeft.x, -sourceBottomLeft.y), canvas);
	}
Notice that we check to see if this our first rendering the brush image in the tracking loop. This if statement works because both the mouse down and mouse up handlers reset the mLastRenderPoint member to NSZeroPoint.
If this is our first time, then there is no previous render point to use as our source image, so we don’t do anything. This matches the real world analog: until we move the brush, no smudging occurs.
If this is not our first time trying to stamp the brush image, then we actually stamp the image. We determine the bottom left coordinate of the previously rendered stamp, then use that as our source in the CGLayerRef. Since we have already applied our mask, the pixels from the layer are shaped just like our brush. As you may note, CGLayerRef makes it nice and easy to draw back into itself.
However, if this is our first time trying to render, that doesn’t necessarily mean we have nothing to do:
 	 else if ( mColor ) {
		// If this is our first stamp, and we have an initial color specified (i.e. the brush
		//	was dirty), we have to render the brush with that color only on the first
		//	stamp. The initial color might be carried to other pixels depending on
		//	how strong the pressure is.
		CGContextSetFillColorWithColor(canvasContext, mColor);
		CGContextFillRect(canvasContext, CGRectMake(0, 0, CGImageGetWidth(mMask), CGImageGetHeight(mMask)));
	}
This is the else clause for the if shown above. If this our first time rendering and we have a color specified, then we need to render it. This actually works the same as a normal brush would. We set the fill color to the same as the initial color and fill the entire rect. Since we have a mask applied, only the pixels in the brush shape are drawn.
Note that we only render the initial color on the first stamp. It will get smudged across the canvas on subsequent stamps, since the stamps are only one pixel apart.
The final part of rendering a single stamp is cleaning up, and remembering where we just stamped:
	CGContextRestoreGState(canvasContext);

	// Remember our last render point, so we know where to pull from
	mLastRenderPoint = point;
}
We update mLastRenderPoint so we can use it the next time we stamp.
The last little bit of the Smudge class that we need to examine is the spacing method:
- (float) spacing
{
	// Smudge has to be spaced by 1 pixel or we get jaggies
	return 1.0;
}
If you recall, the Canvas class calls back into the smudge tool to determine how far apart to space the stamps. In order to avoid a really choppy smudge, we return a spacing of 1 pixel.
Stamp tool
We haven’t really spoken about a stamp tool, but if you know what one is, you probably realized that it sounds a bit like the smudge tool in terms of implementation. Briefly, a stamp tool takes a location on the canvas and copies it to another point on the canvas. It is used to copy parts of an image exactly. The source pixels are determined by the user specifying an offset from the cursor for the stamp tool to pull from.
It will probably make more sense when we look at an example implementation. It is exactly the same as the Smudge class except that the spacing and render functions change.
First, the render function for a stamp tool:
- (void) render:(CGLayerRef)canvas at:(NSPoint)point
{
	// Grab the context for the canvas. No matter what, we're going to determine
	//	where the current brush stamp should go, then translate the context
	//	to that position.
	CGContextRef canvasContext = CGLayerGetContext(canvas);
	CGContextSaveGState(canvasContext);

	// So we can position the image correct, compute where the bottom left
	//	of the image should go, and modify the CTM so that 0, 0 is there.
	CGPoint bottomLeft = CGPointMake( point.x - CGImageGetWidth(mMask) * 0.5,
									  point.y - CGImageGetHeight(mMask) * 0.5 );
	CGContextTranslateCTM(canvasContext, bottomLeft.x, bottomLeft.y);

	// Our brush has a shape and soft edges. These are replicated by using our
	//	brush tip as a mask to clip to. No matter what we render after this,
	//	it will be in the proper shape of our brush.
	CGContextClipToMask(canvasContext, CGRectMake(0, 0, CGImageGetWidth(mMask), CGImageGetHeight(mMask)), mMask);

	// Based on the user specified offset, determine the source bounds.
	CGPoint sourcePoint = CGPointMake(point.x + mOffset.x, point.y + mOffset.y);
	CGPoint sourceBottomLeft = CGPointMake( sourcePoint.x - CGImageGetWidth(mMask) * 0.5,
											sourcePoint.y - CGImageGetHeight(mMask) * 0.5 );

	// We pull straight from the canvas, and render directly onto the canvas. CGLayerRefs
	//	make this easy.
	CGContextDrawLayerAtPoint(canvasContext, CGPointMake(-sourceBottomLeft.x, -sourceBottomLeft.y), canvas);

	CGContextRestoreGState(canvasContext);
}
This should look really familiar. We set up the layer’s context exactly the same as the smudge tool, up to and including setting the brush tip as a mask. A stamp tool doesn’t have a pressure parameter, so we eliminate the line that monkeys with the alpha. Since we’re doing a straight replicate with the stamp tool, we always draw from the canvas layer as our source. The only difference is we don’t pull from our last rendered point. Instead we take our current point and apply the user specified offset to determine what we should use as our brush image.
The only other modification we have to make is to the spacing function:
- (float) spacing
{
	// Standard brush spacing
	return CGImageGetWidth(mMask) * 0.25;
}
All we’re doing here is returning the stamp spacing to the normal spacing. We don’t need the one pixel spacing of the smudge tool to avoid a choppy render, and a wider spacing gives us better performance.
The code for the stamp tool is not included in the downloadable sample code, but you should be able to copy paste the methods provided here into the Smudge class and have them work.
Conclusion
The smudge tool was surprisingly simple to implement. I had done a stamp tool previously, but not presented it, because I felt it was too simple to stand on its own. However, given that its implementation is similar to the smudge tool, I jumped at the chance to present it here.
There’s still plenty that could be improved on here. The smudge tool is begging for pressure sensitivity from a tablet. It could also be made more realistic by accumulating paint and using a textured brush.
Happy smudging!
Download the sample code