How to implement dodge and burn tools
Today we’re going to cover some photographic tools, namely dodge and burn. When I started looking into dodge and burn, I actually didn’t know they had a real world analog, but they do. So to begin with, I’m going to cover what the tools are supposed to be mimicking, then delve into how we’re going to achieve that.
Overview
Dodge and burn are photographic processes that lighten or darken a specific part of an image, respectively. Dodge works by placing an object between the light and the photo, such that the area that should be lightened is blocked from the light. Burn works the same way, except that the card is placed such that it disallows light to every part of the photo except the one the developer wants to darken. If you’re interested, Wikipedia has more in depth coverage of dodge and burn.
Our dodge and burn tools are simply going to lighten and darken the image. As in most bitmap editors, our dodge and burn tools will act like brushes.
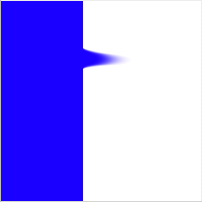
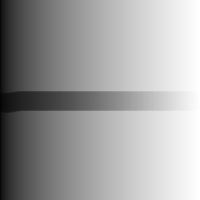
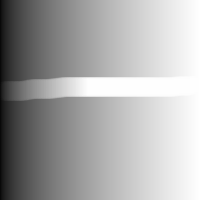
For example, if we have a simple black and white linear gradient, the dodge tool affects it like so:

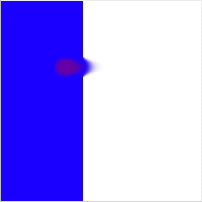
The burn tool has the opposite effect on the same image:
In addition to being able to adjust the strength, often called exposure, of the dodge and burn tools, the user will also be able to determine the range of colors the tools will affect the most: highlights, midtones, or shadows. Although our dodge and burn tools do not exactly mimic the tools found in large commercial packages, I believe they get reasonably close.
Implementation Overview
Since dodge and burn are brushes, they inherit all the properties of our basic bitmap brush. The difference is, instead of using a solid color for the brush tip, they use the source image, after it has been altered by a Core Image filter.
Since the basic brush implementation has been covered before, we’re only going to cover the basic algorithms used in the Core Image filters for dodge and burn. Both the dodge and burn tools only affect a specific range of colors at a time: highlights, midtones, and shadows. Because of this, there will be six filter algorithms shown here (three for dodge and three for burn).
The filters affect each of the color components in the same way. i.e. The function applied to the red channel is the same as the function applied to the green and blue channels. In addition, the range parameter is also per color component. Highlights are the component values closest to 1.0, while midtones are around 0.5, and shadows are close to 0.0. Finally, we’re not going to cover how to implement the exposure parameter here in the overview, but instead show the general filter functions.
Dodge Highlights
The dodge highlights filter will lighten all components, but will affect the components near 1.0 the most. The function for this filter is:
new component = component + e ^ component –1.0
where component is one of pixel component values (red, green, or blue) and e is the math constant.
This yields the graph:
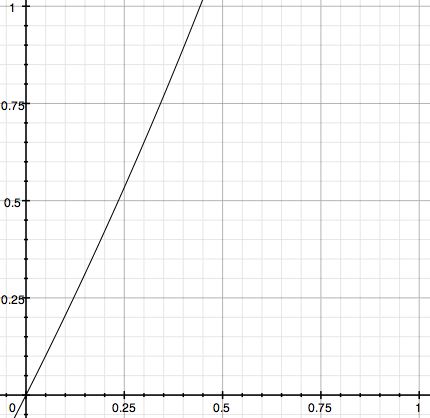
As you can see, for component values closer to 0 (i.e. shadow values), the function is close to the identity function (new component = component, aka y = x). As the component values approach 1, the function diverges from the identity greatly in that the new component value reaches 1 much quicker. The result is that components closer to 1 are pushed towards 1 more quickly than they normally would. i.e. Highlights are lightened.
Dodge Midtones
Dodging midtones will lighten all components, but it will affect the components near 0.5 the most. The function for this filter is:
new component = component + 0.25 * sin(component * PI)
where component is one of pixel component values (red, green, or blue) and PI is the math constant. The constant of 0.25 is just to limit the amplitude.
This yields the graph:
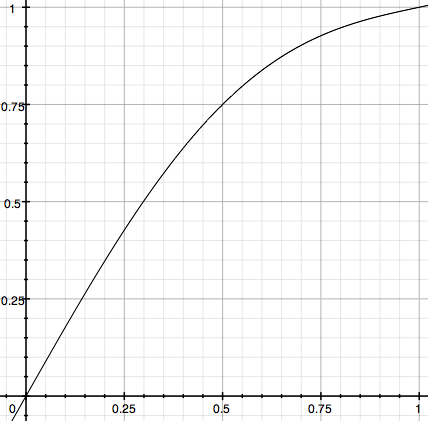
As the graph demonstrates, the function intersects at (0, 0), and (1, 1), just like the identity function, but bows upward in the middle, near 0.5. The result is that components near 0.5 are pushed closer to 1, or in other words, lightened.
Dodge Shadows
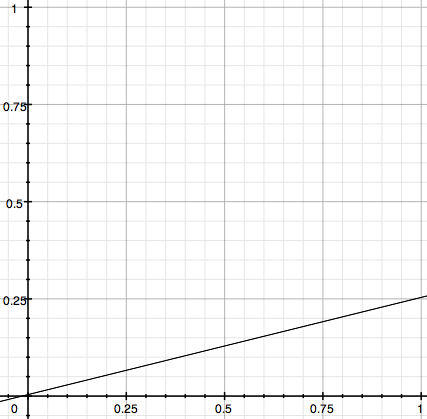
Dodge shadows, like all the other dodge filters, will lighten all colors, but will affect the components closest to 0 the most. The function for this filter is linear:
new component = 0.5 * component + 0.5
where component is one of pixel component values (red, green, or blue).
This yields the graph:
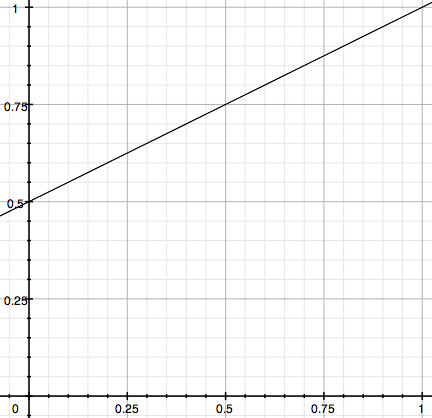
The function intersects at (1, 1), like the identity function, but quickly diverges from it, as the component approaches 0. As it approaches 0, the new components are lightened, in relation to the identity.
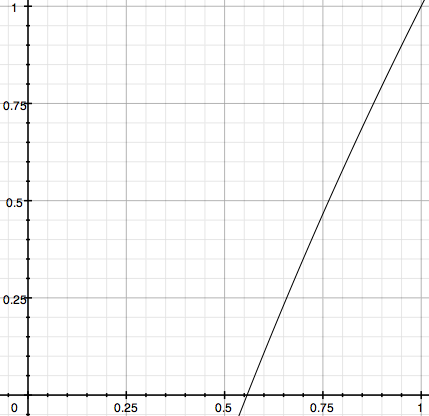
Burn Highlights
Burning the highlights will darken all colors, but will effect the components closest to 1 the most. The function for this filter is:
new component = 0.25 * component
where component is one of pixel component values (red, green, or blue).
This yields the graph:
Note that the function intersects at (0, 0) like the identity function, but then skews the values closer to 1 to closer to 0. i.e. It darkens the highlights.
Burn Midtones
Burning midtones will darken all components, but affects the components closest to 0.5 the most. The function for this filter is almost identical to that for dodging midtones:
new component = component –0.25 * sin(component * PI)
where component is one of pixel component values (red, green, or blue) and PI is the math constant. The constant of 0.25 is just to limit the amplitude.
This yields the graph:
As the graph demonstrates, the function intersects at (0, 0), and (1, 1), just like the identity function, but bows downward in the middle, near 0.5. The result is that components near 0.5 are pushed closer to 0, or in other words, darkened.
Burn Shadows
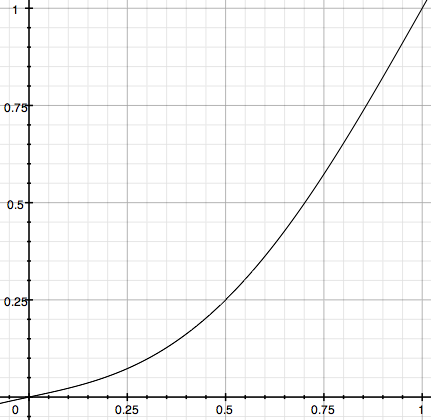
The burn shadows filter will darken all components, but will affect the components near 0 the most. The function for this filter is similar to that of dodge highlights:
new component = component + (1.0 –e ^ (component –1.0))
where component is one of pixel component values (red, green, or blue) and e is the math constant.
This yields the graph:
As you can see, for component values closer to 1 (i.e. highlight values), the function is close to the identity function (new component = component aka y = x). As the component values approach 0, the function diverges from the identity greatly in that the new component value reaches 0 much quicker. The result is that components closer to 0 are pushed towards 0 more quickly than they normally would. i.e. Shadows are darkened.
Code Architecture
As always, I’ve provided sample code for this article. Unlike previous sample code, the code for dodge and burn is somewhat forward looking, in that it provides a framework for future filter brushes. In the future, we can simply discuss the subclasses of FilterBrush and the corresponding filter instead of covering all the other brush related code that just changed a little.
Although all the brushing code is heavily borrowed from the smudge tool, it has been refactored so that it can support generic filter brushes. We’ll go over the changes required to support that, but in general, we’ll ignore the code we’ve already covered in previous articles.
Because the code attempts to set up somewhat of a framework, there are nine classes that make up the sample code: MyDocument, CanvasView, Canvas, GenericBrush, FilterBrush, Dodge, Burn, BurnBrushFilter, and DodgeBrushFilter. Fortunately most of these are carry overs which we’ll ignore since we’ve already dealt with them.
MyDocument, CanvasView and Canvas are the same as they ever were, although Canvas has two new methods which I’ll present later. GenericBrush is all generic brushing code that we’ve carried over ever since the first brush article. It contains a couple of new hooks that subclasses can override.
FilterBrush is where the new code begins. It is an abstract subclass of GenericBrush and deals with rendering a filtered section if the canvas as a brush stamp. Concrete subclasses only need to overload a method to return a configured CIFilter to work.
Dodge and Burn are subclasses of FilterBrush. They load their respective filters, DodgeBrushFilter and BurnBrushFilter, and override a method to return instances to their FilterBrush base class.
DodgeBrushFilter and BurnBrushFilter are CIFilter subclasses, and are nearly identical except for which kernels they load up. They are responsible for actually applying the filter.
We’ll first cover the new methods in Canvas and GenericBrush, then move on to FilterBrush, Dodge, and DodgeBrushFilter. Since Burn and BurnBrushFilter are so similar to their dodge counterparts, we’ll ignore them. However, all the Core Image kernel code will be covered since it is different for each.
Canvas
There are only two new methods on the Canvas class and they’re just used for supporting applying filters to the canvas.
The first one returns the CGContextRef for the canvas:
- (CGContextRef) context
{
	// Just grab the context off the layer
	return CGLayerGetContext(mLayer);
}
Nothing to really discuss here: we just ask our backing CGLayerRef for the CGContextRef.
The next method gets a CIImage that can be used for the input of a CIFilter. Because of a bug, it’s a bit more complicated that it should be:
- (CIImage *) image
{
	// We should theoretically be able to just return [CIImage imageWithCGLayer:],
	//	but we're not able to and get the proper results. Core Image does something
	//	a little indeterminate with the pixels: the effect is applied, but the component
	//	values are shifted.
	// This seems to be caused by the fact we're using a CGLayerRef for both the
	//	source and destination of the effect. I asked on the quartz-dev list
	//	if this was supported or not, and received no answer.
	// The work around is create a deep copy of the layer in a bitmap context.
	//	It is heavy, but it works. Simply created a duplicate CGLayerRef here
	//	doesn't seem to work.
#if 1
	CGSize size = CGLayerGetSize(mLayer);
	size_t width = size.width;
	size_t height = size.height;
	size_t bitsPerComponent = 8;
	size_t bytesPerRow = (width * 4+ 0x0000000F) & ~0x0000000F; // 16 byte aligned is good
	size_t dataSize = bytesPerRow * height;
	void* data = calloc(1, dataSize);
	CGColorSpaceRef colorspace = CGColorSpaceCreateWithName(kCGColorSpaceGenericRGB);

	CGContextRef bitmapContext = CGBitmapContextCreate(data, width, height, bitsPerComponent, bytesPerRow, colorspace,  kCGImageAlphaPremultipliedFirst);

	CGColorSpaceRelease(colorspace);

	CGContextDrawLayerAtPoint(bitmapContext, CGPointMake(0, 0), mLayer);

	CGImageRef imageRef = CGBitmapContextCreateImage(bitmapContext);
	CGContextRelease(bitmapContext);
	free(data);

	CIImage* image = [CIImage imageWithCGImage:imageRef];
	CGImageRelease(imageRef);

	return image;
#else
	return [CIImage imageWithCGLayer:mLayer];
#endif
}
Technically speaking, we should be able to just call the static CIImage method imageWithCGLayer to get our CIImage. Unfortunately, there appears to be a bug in Core Image when you use the same CGLayerRef as both the source and destination of a CIFilter. In that case it tends to lighten the effect a lot more than it should. I am not sure why.
The workaround is to create a bitmap context, copy our layer into it, create a CGImageRef from that, then produce a CIImage from the CGImageRef. It’s a lot more involved, not to mention slower.
GenericBrush
The GenericBrush is the same brushing code that it has always been. In the sample code however, we’ve pulled it out into its own class and added a few methods that can be overridden by subclasses. By default, these methods do nothing:
// Subclass overrides so that they can know when we about to start and stop brushing
- (void) startBrush:(Canvas *)canvas;
- (void) stopBrush;

	// Override for sublcasses to implement brush render
- (void) renderInCanvas:(Canvas *)canvas bounds:(CGRect)bounds at:(NSPoint)point;
startBrush and stopBrush are optional overrides, used in case the brush needs to do special set up or take down before or after a brush stroke. startBrush is invoked inside the mouseDown handler before the first stamp is rendered, and stopBrush is invoked in the mouseUp handler after the last stamp is rendered.
renderInCanvas is a required override for subclasses. It renders a single brush stamp. Before invoking renderInCanvas, the GenericBrush class will have already set up the canvas with the proper clipping and whatnot. The subclass only needs to render a stamp at the specified point.
FilterBrush
The FilterBrush class derives from GenericBrush and provides a base class for all future filter-based brushes, which, in this case, will be Dodge and Burn. It does all the set up for Core Image and the actual rendering of the single brush stamp.
Initialization
Although FilterBrush doesn’t add any new properties to the brush, it does need to cache some data, as seen in the init method:
- (id) init
{
	self = [super init];
	if ( self != nil ) {
		// Initialize to nil
		mFilter = nil;
		mCIContext = nil;
	}
	return self;
}
In order to get decent performance out of brushing with a filter, we have to cache both the CIFilter we’re applying and the CIContext we’re rendering into. If we don’t, performance is bad enough that the brush is unusable at any size.
Setting up the Brush Stroke
In order to implement the caching, we use the startBrush and stopBrush methods we just covered in GenericBrush. This means we cache the filter data for one brush stroke. With some more complicated logic, we could potentially be more aggressive with the caching and get even better performance, by caching for more than one stroke.
First, let’s cover the startBrush method:
- (void) startBrush:(Canvas *)canvas
{
	// This gets called right at the mouse down, before we start stamping. We
	//	should do any set up here.

	// Ask the subclass for our filter. Cache it since it is expensive to keep
	//	creating for each stamp we render.
	mFilter = [[self filter] retain];
The first step is to get and cache our filter. We don’t know what the filter is, being an abstract class and all, but our subclass does, so ask them. We, as the base class, expect the filter to already be configured and ready to go, with the exception of the input image:
	// Ask the canvas for a representation of itself as an image. Pass that off
	//	to our filter to be applied to.
	CIImage* inputImage = [canvas image];
	[mFilter setValue:inputImage forKey:@"inputImage"];
We ask the canvas for a CIImage representation of itself, and then give that to the filter as input.
Finally, we need to cache the CIContext we’ll be rendering into:
	// Since we're a filter brush, we're rendering right back onto the canvas,
	//	so ask the canvas for the context to render into. Convert the normal
	//	context into a Core Image context, and cache it off (it's expensive to
	//	destory).
	CGContextRef context = [canvas context];
	mCIContext = [[CIContext contextWithCGContext:context options:nil] retain];
}
Not much here. We ask the canvas for its context, then build a CIContext from it.
Rendering a Stamp
Now that we have our filter and context set up, we’re going to start getting render requests from the base class. We handle that in renderInCanvas:
- (void) renderInCanvas:(Canvas *)canvas bounds:(CGRect)bounds at:(NSPoint)point
{
	// Render a single stamp. In our case, that simply means asking the Core Image
	//	context to draw the output of our filter, at the specified stamp location.
	//	Our base class that called us has already set up the mask clipping so
	//	our stamp will be properly shaped.
	[mCIContext drawImage:[mFilter valueForKey:@"outputImage"] atPoint:bounds.origin fromRect:bounds];
}
Since we already have the filter and context, and the base class has already set up the context and helpfully passed in the stamp bounds, all we do is ask the CIContext to render the resulting image. Easy as pie.
Tearing down the Brush Stroke
When we are done with a single brush stroke, we need to clean up our cache. We do that in stopBrush:
- (void) stopBrush
{
	// This gets called after the mouse up, and the last stamp is rendered. We
	//	should do any clean up here.

	// We're done with the filter and context, so free them up.
	[mFilter release];
	[mCIContext release];
	mFilter = nil;
	mCIContext = nil;
}
This is pretty self-explainatory: we release the cached filter and context. Note that this is a fairly expensive operation.
Spacing
As we saw with the smudge tool, stamp spacing changes based the kind of brush. The filter tools, dodge and burn, are no different. So we overload the spacing method:
- (float) spacing
{
	// By filter brushes typically want closer spacing so the effect is smoother
	return 1.0;
}
Through trial and error I discovered decreasing the spacing to one pixel improved the quality of the rendering, so we do that here.
Loading an Image Unit Plugin
Although not used in the FilterBrush class itself, FilterBrush does provide a helper method to load up image unit plugins. This is useful for subclassed brushes who have custom filters stored in the application bundle:
- (void) loadFilter:(NSString *)filterName fromPlugin:(NSString *)pluginName
{
	// Helper function to ensure the given filter is loaded, so we can use it.

	// Ask the system to load up all the plugins it knows about
	[CIPlugIn loadAllPlugIns];
	NSArray *filterList = [CIFilter filterNamesInCategories:nil];

	// Check to see if our filter is loaded (it should be if we added to a system
	//	path.). If it is in a plugin in the application bundle, then it won't
	//	be found.
	if( ![filterList containsObject:filterName]) {
		// It wasn't loaded by default, so manually load it

		// Construct the path to the plugin bundle. We assume it's in the application
		//	bundle, in the plugins folder.
		NSString *path = [[[NSBundle mainBundle] builtInPlugInsPath] stringByAppendingPathComponent:pluginName];

		// Explicitly load the plugin, given the path
		[CIPlugIn loadPlugIn:[NSURL fileURLWithPath:path] allowNonExecutable:NO];
	}
}
This is fairly standard Core Image code. We ask the system to load up all the known Core Image plugins, then look for our specific filter. If it’s there, then we’re done. If not, then we look in our Plug-Ins folder inside our application bundle for the plug-in, and ask CIPlugIn to manually load that plug-in.
Dodge
The Dodge class implements the dodge tool by deriving from the FilterBrush, and overriding the filter method. It has a couple of parameters, which are the same as the Burn tool.
Parameters
The two parameters are initialized in the init method (in addition to the parameters in the GenericBrush init):
- (id) init
{
	self = [super init];
	if ( self != nil ) {
		// First, make sure our filter is loaded. We don't have to do it now
		//	but its convienent here.
		[self loadFilter:@"DodgeBrushFilter" fromPlugin:@"Filters.plugin"];

		// Set the default values for our parameters
		mExposure = 1.0;
		mRange = kDodgeRange_Midtones;
	}
	return self;
}
There are two new parameters for the Dodge and Burn tools: mExposure and mRange.
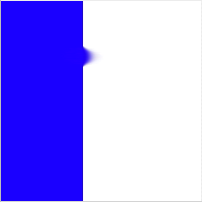
- mExposure Exposure determines how strong the dodge or burn is applied. It ranges from 0.0 to 1.0, where 0.0 means the effect isn’t applied, and 1.0 is where the effect is at its strongest.
Dodge examples:
- mExposure = 0.25,

- mExposure = 0.5,

- mExposure = 1.0,

- mExposure = 0.25,
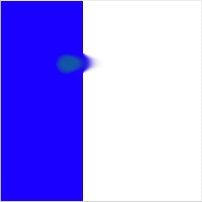
- mRange Range determines the range of pixels that the dodge tool is applied to. It is an enumeration that includes highlights, midtones, and shadows. Highlights are those closest to 1, midtones those closest to 0.5, and shadows are those closest to 0.
Dodge examples:
- mRange = kDodgeRange_Highlights,
- mRange = kDodgeRange_Midtones,

- mRange = kDodgeRange_Shadows,

- mRange = kDodgeRange_Highlights,
We use a black to white linear gradient because it represents the entire component range, from shadows to highlights.
The only other thing to note about the init method is that we manually load up our filter, by invoking the parent class helper method.
Creating a filter
The only real task of the Dodge tool is to create the appropriate filter based on its parameters. This is accomplished in one method, filter:
- (CIFilter *) filter
{
	// We need to create and configure our filter here.

	// Pull out our special filter, and set the exposure to be exactly
	//	what was given to us.
	CIFilter * filter = [CIFilter filterWithName:@"DodgeBrushFilter"];
	[filter setDefaults];
	[filter setValue:[NSNumber numberWithFloat:mExposure] forKey:@"inputExposure"];

	// Configuring the range is slightly more complicated because we have to
	//	convert an enumeration to a straight number.
	switch ( mRange ) {
		case kDodgeRange_Highlights:
			[filter setValue:[NSNumber numberWithInt:kDodgeFilter_Highlights] forKey:@"inputRange"];
			break;
		case kDodgeRange_Midtones:
			[filter setValue:[NSNumber numberWithInt:kDodgeFilter_Midtones] forKey:@"inputRange"];
			break;
		case kDodgeRange_Shadows:
			[filter setValue:[NSNumber numberWithInt:kDodgeFilter_Shadows] forKey:@"inputRange"];
			break;
	}

	return filter;
}
Here we simply ask CIFilter for an instance of our dodge filter (not the system one), which we loaded up in our init method. Note that our dodge tool parameters have a one to one mapping with the dodge filter parameters, so we just pass them through unchanged. After we’re done configuring our filter, we return it.
It should be noted that the Burn class is identical to the Dodge class, except that it uses the burn filter instead of the dodge filter.
DodgeBrushFilter
DodgeBrushFilter is a CIFilter derived class that is housed in an image unit plugin that our main application loads. It is a fairly standard filter, whose main task is to select the correct kernel to apply to the image passed in.
Like most CIFilter classes, we load the kernels in the init method:
static NSArray	*sKernels = nil;

- (id) init
{
	// If we haven't loaded up our array of kernels, do so now
	if ( sKernels == nil ) {
		// Look for our kernel code file inside of our bundle
		NSBundle *bundle = [NSBundle bundleForClass:[self class]];
		NSString *code = [NSString stringWithContentsOfFile:[bundle pathForResource:@"DodgeBrushFilter" ofType:@"cikernel"]];

		// We have three kernels in the file: highlights, midtones, and shadows.
		//	The range parameter selects which one we'll use. Cache them.
		sKernels = [[CIKernel kernelsWithString:code] retain];
	}

	return [super init];
}
We keep our kernels in a static variable so we don’t waste time loading them each time. The kernels are all stored in one file, DodgeBrushFilter.cikernel, which is kept inside the Image Unit Plugin bundle. We load the cikernel file, convert it to an array of CIKernels, and cache those off. There are three kernels loaded: one for each range.
Our dodge filter has two custom parameters, which we declare in the customAttributes method:
- (NSDictionary *) customAttributes
{
	// Return the custom attributes, which, in our case, is just the
	//	exposure and range parameters.
	return [NSDictionary dictionaryWithObjectsAndKeys:

		[NSDictionary dictionaryWithObjectsAndKeys:
			[NSNumber numberWithFloat: 0.0], kCIAttributeMin,
			[NSNumber numberWithFloat: 1.0], kCIAttributeMax,
			[NSNumber numberWithFloat: 0.0], kCIAttributeSliderMin,
			[NSNumber numberWithFloat: 1.0], kCIAttributeSliderMax,
			[NSNumber numberWithFloat: 0.5], kCIAttributeDefault,
			[NSNumber numberWithFloat: 0.0], kCIAttributeIdentity,
			kCIAttributeTypeScalar, kCIAttributeType,
			nil], @"inputExposure",

		[NSDictionary dictionaryWithObjectsAndKeys:
			[NSNumber numberWithInt: kDodgeFilter_Highlights], kCIAttributeMin,
			[NSNumber numberWithInt: kDodgeFilter_Shadows], kCIAttributeMax,
			[NSNumber numberWithInt: kDodgeFilter_Highlights], kCIAttributeSliderMin,
			[NSNumber numberWithInt: kDodgeFilter_Shadows], kCIAttributeSliderMax,
			[NSNumber numberWithInt: kDodgeFilter_Midtones], kCIAttributeDefault,
			kCIAttributeTypeScalar, kCIAttributeType,
			nil], @"inputRange",

		nil];
}
As with the dodge brush, the parameters are exposure and range. They mean exactly the same thing they did in the Dodge class.
The last part of our filter is the outputImage method, which actually constructs the output CIImage:
- (CIImage *) outputImage
{
	// The idea is to apply the kernel selected by the range parameter, to
	//	the image passed in. We don't really do any fancy preprocessing.
	CISampler *sampler = [CISampler samplerWithImage:inputImage];
	CIKernel *kernel = [sKernels objectAtIndex: [inputRange intValue]];

	// Just apply the chosen kernel
	return [self apply:kernel, sampler, inputExposure, kCIApplyOptionDefinition, [sampler definition], nil];
}
This is also a reasonably simple method. We create a sampler from our input image, and pull a kernel out of our cached array using the range parameter as an index. We then apply the chosen kernel to our image, and we’re done.
Like with the brushes, the burn filter is identical to the dodge filter, except that it loads up the burn kernels and applies those instead.
Kernels
The real meat of all this code are the kernels. They are straightforward implementations of the functions presented in the overview section, so not a lot of explanation will be given. The only difference is the kernels deal with implementing the exposure parameter, which the function presented in the overview section ignored.
Dodge Highlights
kernel vec4 dodgeHighlights(sampler image, float exposure)
{
	vec4 source = unpremultiply(sample(image, samplerCoord(image)));

	float factor = exposure;

	source.rgb = source.rgb + factor * (exp(source.rgb) - 1.0);

	return premultiply(source);
}
Dodge highlights is almost identical to the overview function presented. Note that we apply the function to all three components (RGB) at once, and the exp() function is e raised to the value passed in. In this case, the exposure is used directly to scale the steepness of the function.
Dodge Midtones
kernel vec4 dodgeMidtones(sampler image, float exposure)
{
	vec4 source = unpremultiply(sample(image, samplerCoord(image)));

	float pi = radians(180.0);
	float factor = exposure * 0.25;

	source.rgb = source.rgb + factor * sin(source.rgb * pi);

	return premultiply(source);
}
Dodge midtones is fairly straightforward. We scale the exposure by a quarter just so we don’t push values to 1 too quickly.
Dodge Shadows
kernel vec4 dodgeShadows(sampler image, float exposure)
{
	vec4 source = unpremultiply(sample(image, samplerCoord(image)));
	float factor = (1.0 - exposure * 0.5);

	source.rgb = factor * source.rgb + (1.0 - factor);

	return premultiply(source);
}
For dodging shadows, we scale the exposure by half so we don’t push everything to 1 at its peak. Also, since we’re using a linear function, we have to make the y intercept dependent on the slope. i.e. Both slope and y intercept are based on the exposure.
Burn Highlights
kernel vec4 burnHighlights(sampler image, float exposure)
{
	vec4 source = unpremultiply(sample(image, samplerCoord(image)));

	float factor = (1.0 - exposure * 0.75);

	source.rgb = factor * source.rgb;

	return premultiply(source);
}
Note that burning highlights is also a linear function. However there is no y-intercept because we want it to intersect at (0, 0). Also note that we scale the exposure by 3/4.
Burn Midtones
kernel vec4 burnMidtones(sampler image, float exposure)
{
	vec4 source = unpremultiply(sample(image, samplerCoord(image)));

	float pi = radians(180.0);
	float factor = exposure * 0.25;

	source.rgb = source.rgb - factor * sin(source.rgb * pi);

	return premultiply(source);
}
Burning midtones is identical to dodging midtones, except that we subtract off the sine wave. Like before, we scale the exposure by 1/4 before using it.
Burn Shadows
kernel vec4 burnShadows(sampler image, float exposure)
{
	vec4 source = unpremultiply(sample(image, samplerCoord(image)));

	float factor = exposure;

	source.rgb = source.rgb + factor * (1.0 - exp(1.0 - source.rgb));

	return premultiply(source);
}
Burning shadows is the same idea as dodging highlights, except that we’ve flipped the function upside down.
Method to the Madness
It took me a long time to figure out the current kernels for each of the ranges. On the surface, dodge and burn sound easy: you just lighten or darken the image. But when I started playing with existing dodge and burn tools, I found that it wasn’t quite that simple.
I started out with simple linear functions for the highlights and shadows. With some tweaks this worked respectably well for dodging shadows and burning highlights, but was way off for dodging highlights and burning shadows. In other implementations these tools pushed components to the extreme (either 0 or 1 depending on the tool) very quickly. It seemed exponential to me, which lead to the current implementation eventually. I started with base 2 instead of e though, on the presumption that 2 was more likely because it would execute faster.
Dealing with midtones took me a while. I knew I needed a curve that would be highest in the middle, but wasn’t sure which function would yield the best results. I actually started out with a gaussian function, but I concluded that was way too complex for anyone to really use for a filter. I then played around with making a curve with smooth step, but I wasn’t happy with the results. I’m not sure why sin wasn’t the first function to pop into my head when I knew I needed a curve, but it turned out to be the one to yield the best results.
I’m not sure if this how the big graphics apps implement dodge and burn, but the results seem reasonably close to me. Unfortunately no one seems to publish how they implemented dodge and burn. As a result, this took me a long time to figure out. I literally started writing this article three times before, but stopped because I wasn’t happy with the results of the tools. I also spent a lot of time in Grapher, Apple’s graphing calculator program staring at the graphs of various functions.
Conclusion
In addition to showcasing some relatively complex brushes, this article introduces a framework that we can build off of to implement other filter brushes. For example: sharpen, blur, and sponge tools.
This is one of the more satisfying articles to write, just because of what it took to implement the dodge and burn tools. Enjoy, and be sure to download the sample code.