
How to implement sharpen and blur tools
The sharpen and blur tools are simple bitmap tools. They allow you to blur or sharpen parts of an image using a brush metaphor. In addition to being able to control the strength of the sharpen or blur, these tools also typically allow you to control the blend mode when applying the effect.
The sharpen tool has the following effect on this tweed pattern:
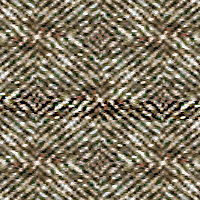
Notice the stripe through the middle where the edges are more strongly defined.
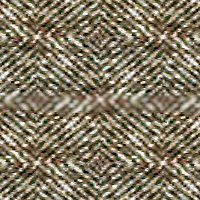
The blur tool has the opposite effect of sharpen on the tweed pattern:
Implementation Overview
Like the sponge tool, the sharpen and blur tools are subclasses of the FilterBrush class introduced in the dodge and burn tutorial. However, unlike sponge, they do require a slight modification to the GenericBrush class to work.
Since almost all of the code in this tutorial has been covered before, I’ll just highlight the single change to the GenericBrush class, and the new Sharpen and Blur classes. If you want to see everything, download the code.
Changing GenericBrush
If you recall, at the very beginning of this article I mentioned that sharpen and blur tools typically allow the user to modify the blend mode. This is the blend mode used when stamping the filtered image back on to the original image. GenericBrush contains the code that handles the stamping, so it will need to be modified.
We change the render:at: method for GenericBrush to be:
- (void) render:(Canvas *)canvas at:(NSPoint)point
{
	CGContextRef canvasContext = [canvas context];
	CGContextSaveGState(canvasContext);

	CGPoint bottomLeft = CGPointMake( point.x - CGImageGetWidth(mMask) * 0.5, point.y - CGImageGetHeight(mMask) * 0.5 );

	// Our brush has a shape and soft edges. These are replicated by using our
	//	brush tip as a mask to clip to. No matter what we render after this,
	//	it will be in the proper shape of our brush.
	CGRect brushBounds = CGRectMake(bottomLeft.x, bottomLeft.y, CGImageGetWidth(mMask), CGImageGetHeight(mMask));

	CGContextClipToMask(canvasContext, brushBounds, mMask);
	CGContextSetBlendMode(canvasContext, [self blendMode]);
	[self renderInCanvas:canvas bounds:brushBounds at:point];

	CGContextRestoreGState(canvasContext);
}
The only change made is the call to CGContextSetBlendMode that allows brush subclasses to determine the blend mode to use. The default implementation is simply:
- (CGBlendMode) blendMode
{
	return kCGBlendModeNormal;
}
That’s it for GenericBrush.
Sharpen Tool
The sharpen tool has just two parameters: mMode, which is the blend mode, and mStrength which determines how strong the sharpen effect is applied. They are initialized in init like so:
- (id) init
{
	self = [super init];
	if ( self != nil ) {
		// Set the default values for our parameters
		mMode = kCGBlendModeDarken;
		mStrength = 1.0;
	}
	return self;
}
Here are some examples of the sharpen tool parameters:
| mMode | mStrength | Result |
|---|---|---|
| kCGBlendModeNormal | 0.5 | 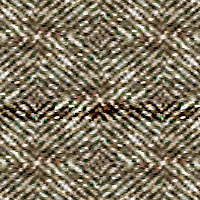 |
| kCGBlendModeNormal | 1.0 |  |
| kCGBlendModeDarken | 1.0 | 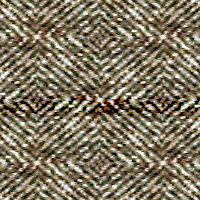 |
| kCGBlendModeLighten | 1.0 | 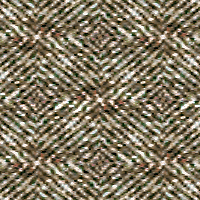 |
The blend modes typically offered for a sharpen tool are kCGBlendModeNormal, kCGBlendModeDarken, kCGBlendModeLighten, kCGBlendModeHue, kCGBlendModeSaturation, kCGBlendModeColor, and kCGBlendModeLuminosity. In the examples above, kCGBlendModeDarken causes the sharpening to only affect light pixels and kCGBlendModeLighten only affects dark pixels.
The heart of the sharpen tool is the filter it creates. The code for that is:
- (CIFilter *) filter
{
	// We need to create and configure our filter here
	CIFilter * filter = [CIFilter filterWithName:@"CIUnsharpMask"];
	[filter setDefaults];
	[filter setValue:[NSNumber numberWithFloat:mStrength * 100.0] forKey:@"inputRadius"];
	return filter;
}
You’ll notice that I’m using the unsharp mask filter to do the sharpening. I should point out that most image editors don’t use this filter to do the sharpening. Instead, they seem to use a convolution filter to do the sharpening. However, the convolution filter means it is easy for the user to overdue the effect. Unsharp mask does not have that problem, plus unsharp mask is provided by the system.
The final bit of the sharpen tool is returning the correct blend mode:
- (CGBlendMode) blendMode
{
	return mMode;
}
Blur Tool
The blur tool is very similar to the sharpen tool. It even takes the same parameters. The only real difference is the filter that it creates, so that’s what I’ll present first:
- (CIFilter *) filter
{
	// We need to create and configure our filter here.
	CIFilter * filter = [CIFilter filterWithName:@"CIBoxBlur"];
	[filter setDefaults];
	[filter setValue:[NSNumber numberWithFloat:mStrength * 7.0] forKey:@"inputRadius"];

	return filter;
}
Here I use the built in CIBoxBlur. mStrength ranges from 0 to 1, inclusive. I set the coefficient of 7 simply by trial and error until I got something that “looked right.”
Here are some examples of the blur tool:
| mMode | mStrength | Result |
|---|---|---|
| kCGBlendModeNormal | 0.5 | 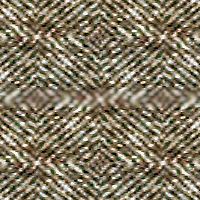 |
| kCGBlendModeNormal | 1.0 | 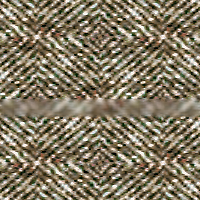 |
| kCGBlendModeDarken | 1.0 | 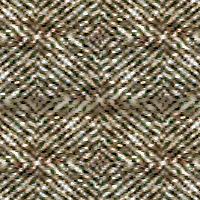 |
| kCGBlendModeLighten | 1.0 |  |
Conclusion
Sharpen and blur are the last of the common filter brushes. Enjoy, and download the sample code.